Sunday 12 December 2010

That's a wrap.

And thats it, all finished. After a full two weeks of shooting the green screen is rolled up and the lights are all back in their bags.
It has been very tiring, sometimes frustrating and occasionally very very cold but also a lot of fun and we managed to punctuate the filming with enough eating, drinking and Call of Duty to make it feel almost like a holiday.
Now begins the next stage of logging the huge amount of footage that we have come away with. In true Red Ded Dog style we just filmed everything from every angle we could think of in the hope that this way we won't find ourselves missing that one vital shot when we finally get to the edit.
We have nothing to worry a bout though. Checking the rushes each night brought a grin to our faces without fail and seeing the first rough VFX tests just made it even bigger. There is no question that we have some great performances from a great cast and have got everything we need and more to make a really good film.
We hope to have some kind of teaser/trailer type thing to show at Stand Up Cinema on the 17th so get yourselves to that if you can. In the meantime here are some stills taken whilst shooting so you can relive the joy. This album will be expanded when we have collected all the pictures together.

Thursday 9 December 2010

By the Light of the Moon - Filming Update

A big thank you to our primary sponsors
Shooting is drawing to a close on our latest film By the Light of the Moon and we thought now would be a good time to tell people what we have been up to and to show off some stills that will hopefully show what we are aiming for with this latest project.

We began filming on the 1st of December after a day and a half of read throughs and rehearsals and have been living on set and filming every day since.

First contact
We have had major, last minute script changes, constant schedule changes, broken lamps, falling lights, parking fines, late nights and early mornings. We have also been trying stuff that we have never done before, namely working with green screen, and while it has been a pretty nerve wracking it has worked out well and the finished product is going to look really really cool.

We would like to say a massive thank you to Stu who agreed to play our alien for us without really realising exactly what we had in mind for it and ended up with head and hands entirely covered in silicone and wearing a wet suit for many hours, unable to eat, drink or smoke and having to stand in the garden when the sweat inside his mask got so much that it was running out of the nose holes.
Alien concept #1
The best way to justify inflicting this unpleasantness on our mates is to show you just how cool it is going to look when it is finished so we gave to footage to Freddie, our Visual Effects Supervisor, and he knocked up these stills for us in about half an hour. They are not finished and will probably bear little resemblance to what appears in the final film but they put our minds at ease and look good enough to share with the world so enjoy.

We would like to also say a couple more thank yous. To Real Time for the loan of lights, green screen and assorted other kit and also to Sterling Recruitment who had enough faith in us to step in with funding for this project and without whom this film would probably not have happened.
Alien concept #2

We also have a date for your diaries. Real Time host Stand Up Cinema every month and have agreed to let us screen something at the next one which is taking place on Dec 17th at The Rising Sun Arts Center in Reading. We will be showing some of our earlier films but will also be giving the first screening of the trailer for By the Light of the Moon so if you like what you see here then get yourself down on the 17th for some more.

Saturday 27 November 2010

Platsil Gel-10

Recently we have been playing around with using silicone for our effects instead of latex and though we are still a long long way from becoming makeup effects experts we have learnt a couple of things that are useful to know.

THICKENER
Without this the only effect you can achieve is making it look like you got sneezed on by a giant as un thickened silicone is pretty runny and can't be shaped or sculpted at all. This can be a good thing as it is self levelling which means you can get a really nice smooth finish if you can stop it going everywhere.
If you want to make any kind of shapes then a squirt of thickener will let you sculpt directly on to your subject and the silicone will hold its shape even before it starts to go off.

TIMING
Although Gel-10 has a working time of only a few minutes before it starts to set you don't actually have to rush as much as you would think. Five minutes is a pretty long time really so just make sure you mix up batches that are as small as possible and you wont have to race against the clock

COLOUR
Silicone pigment is pretty expensive so we only had really bright, hammer horror red and generic skin pink which was not really any good for what we wanted so we tried to colour it with acrylic paint the way we would do with latex. Bad move.
Silicone does not go off when mixed with acrylic and I spent the entire 2 Days Later film comp with a very sticky neck for this reason. Fork out for some proper silicone pigment and it will see you good for ages as you only need to use a drop each time.

HAIR
We learnt through pain that latex does not come out of hair. Most people who where involved in Loki's Gate suffered a certain amount of involuntary waxing in the process but thankfully silicone is another beast all together.
While you don't want to be just pouring it all over your head it is not as much of a pain if you do get it in hair. It will come off arms without leaving a bald patch and a little vaseline will mean you can go over eyebrows and stuff as well.

PRACTICE
Silicone is really nice to work with but it is quite tricky too so just play around as much as you can. We have used up nearly 2kg of Gel-10 just getting to used to it and other than the wounds we made for 2 Days Later we have nothing really to show for it.
Big thanks to Howard for letting us cover his entire face with the stuff and Stu for going one step further and having his entire head covered including his mouth and for putting up with us accidentally siliconing his eyes shut.

We start filming our latest project on Wednesday and this will feature our first sunscreen silicone work. We will keep you posted on this and hope to have something for you all to see by the end of the year.

Tuesday 16 November 2010

Clive Is Alive!

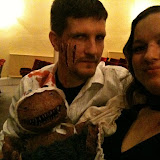
So much good stuff has been said about the alien baby we made for Dead Time (who we lovingly named Clive) that we thought we would do a post about how we made him. Full credit has to go to Effie (who also played Jo in the film) for doing nearly all the work on the build.

Whenever we try to do a new effect it always starts off looking rubbish but we have learned that the secret is to push on through that stage and just believe that when it is finished and in front of the camera it WILL look awesome and Clive is a great example of that.

First of we had a quick chat about what kind of creature we wanted and Woodie did us a design on paper that pretty much nailed it so we jumped straight in to the fun bit with very little planning.

The first step was justto get a basic body shape to build on to. We used old newspaper and held it in shape with parcel tape, making sure to leave hand sized spaces in the back of his head and his back to allow the puppeteers to operate him when finished.

We kept adding newspaper to smooth the shape out and attached a pair of heavy rubber gardening gloves to act as his flippers. The thumbs of the gloves are inside hi chest cavity which means the operator can get a good grip and really get him moving.

Once the basic shape was done we began covering him in a layer of more newspaper soaked in liquid latex. This covers bumps and wrinkles and dries tough, flexible and fairly waterproof which was important as we knew he would be getting covered in slime and blood for the shoot.

We also made a bladder from two sheets of dry latex stuck together and set this in to his chest with a tube attached through the back of his head so that we could make him breath.

With the latex skin dried we painted him with more latex coloured with acrylic paint. We put on a few layers, tweaking the colour and adding shading with each one.

With this done the final details where added. Webbing and ridges where built up of newspaper and latex, teeth and claws made from the prongs of plastic forks, a tongue from a latex soaked sponge and two marbles added as eyes.

After a final coat of acrylic paint he was done. A kinda nasty but kinda cute alien foetus made from stuff we had lying around the house.

On the shoot we had two people on the floor out of shot to operate him. One with their hands in his back making has flippers move and one with a hand in his head to do his mouth and to blow in to the pipe to make him breath.

We made up a big pan of really thick arrowroot blood and another of clear arrowroot slime and slopped it all over everything. Poor old Freddie, who had only come along to be camera operator, ended up on flipper duty and got totally covered in the stuff but was very professional and waited till we called cut before telling us exactly what he though of us and our stupid film :)

Check out the other photos for a full run down of the process.

Sunday 14 November 2010

Our First Auditions

We spent the bulk of yesterday doing auditions for the remaining parts in our new project. We had one session in Reading in the afternoon and then another in the evening in London and while it was a very positive experience and threw up a few actors we definitely want to work with it was also a very very strange process.
On previous projects our preferred method of finding actors has been to pressgang people in to agreeing whilst out at the pub so we had no real idea of what to expect during a structured audition process or what was expected of us by the people who we would see and I think we where probably the most nervous people on the day.
Nearly every scene in this script involves four or five people so each reading saw one of us taking on several parts while the auditioning actor chipped in with their relevant pieces and we are very grateful that everyone we saw was very forgiving of our faffing about.

By far the weirdest thing about the audition process id the speed at which you have to greet, judge and then send people away. We gave each person 20 minutes which I am sure is longer than some but it still felt very weird and business like having to skip all small talk and drop straight in to reading a script over and over again with complete strangers.
When you meet new people, especially people with whom you share an interest, the inclination is to chat and take your time and having to the whole process in such short time was really tough.

On the positive side we were very pleased that everyone we spoke to seemed genuinely interested in the project and understood the characters and the things that we are trying to get across. This might mean that we have written a flat and obvious script but hopefully it means that we have managed to write something that conveys all the meaning and sub text that we hoped it would and that we can now start to film with a cast of really great actors.
It was a long and tiring day and something which we will be doing more of in the future but fortunately it went well and did exactly what we hoped it would.
Now bring on the filming!

Monday 1 November 2010

Dead Time / Loki's Gate Double Feature


Our YouTube channel is now up to date with all of our films. This latest update comes as a double feature of of our first film 'Loki's Gate', shown here in it's entirety as four gut tearingly scary, zombie filled chapters and our latest film, the award winning short 'Dead Time'.
The double feature is apt not just because it shows our first and last project but also because the two films share a location. You may notice a similarity between the holiday cottage in Loki's Gate and the house in Dead Time and our thanks go again to Mart and Lucy for providing us with a great location.

We really hope you like the films so far and will help us spread the word. We already have a new project going which should be finished in the new year and we will try to keep you up to date with it's progress as it happens.

Again we would like to say a huge thank you to everyone who helped out - the cast Myles Hillier, Effie Jessop and Howard King, Freddie Lewis-Wall for his After Effects skills, Russell Clark (aka DJ Muzzell) for saving our audio and providing music and sound effects, Harry Jessop for being the loudest clapper boy ever and Mart and Lucy for donating their house as a set (again).

Sunday 31 October 2010

2 Awards Later


We just got back from 2 Days Later, tired, a little hung over but still unashamedly revelling in our success at our first ever competition.

There were 51 films submitted this year so just getting shortlisted was really exciting but we are very pleased to report that we also walked away with awards for Best Visual Effect and Best Gore and that Woodie also won a runner up prize in the best fancy dress for his awesome silicone face wounds.

Over all it was a brilliant night. The crowd was really enthusiastic, the other films where great and varied and set some very high standards especially in the cinematography department, we met some cool people and came away from the night feeling inspired and raring to go on our next project (watch this space for more details on this very soon).
Competitions will definitely be featuring more in our grand plan in the future after this. They are a great way to work on ideas that might not normally think of and also a great way to meet other film makers and actors working at the same level.

We are collecting together photos from the event and uploading them as we get them so you can see what we got up to in sunny Margate.
Click the image to visit the album.

Thursday 28 October 2010

RDD at the Whitley Arts Festival

Last night was the first truly public showing of The Light. It ran as part of a film evening at the Retreat in east Reading and we are pleased to say that it was very well received and the night was great all round.
We knew very little about the festival or the venue and wondered how well The Light would fit in to a night of experimental film and while it did seem very linear when played next to the like of Street Of Crocodiles by the Brothers Quay we got a lot of positive feedback and met some really cool people with a genuine interest in what we are doing which is always very encouraging.
We also got to do an impromptu showing of Dead Time ahead of official competition showing on Saturday night.

What was interesting about the night was that it almost passed us by un noticed. When we made our first film we didn't think there would be an outlet for films like ours or anyone who would be very interested in them beyond friends and family but what you find is that with only a little searching you begin finding small festivals and competitions, new venues that promote local film and arts and a really friendly and encouraging group of people all eager to help each other out and get involved.
It all reinforces our belief that if you want to do something like make a film then just get out and do it. It really doesn't matter if you know what you are doing or not. The best way to learn is to just give it a go and the chances are you will find that there are others doing it too and a whole scene that you never knew existed.

Monday 25 October 2010

Platsil Gel-10. Harder than it looks.

Our first attempt at working with silicone quickly descended into hastily slopping it around just to see what it would set like and all we really learned was that without thickener there is not a lot you can do except make a mess. So, after picking up a bottle of Thi-Vex Silicone Thickener from 4D Model Shop we set about trying again.

The second attempt is definitely a step up from the first but it is safe to say that it is not as easy as Brick In The Yard make it look and that many hours of practice are going to be needed.
That said, Gel-10 is great stuff. It is much nicer to work with than the latex and tissue paper we have used in the past and while it is more expensive I think it is definitely worth the money.
The main thing to learn is going to be how thick to make it for different applications and how it behaves at different stages in it's curing process so you know when to stop shaping it and just let it set.
There is also a shopping list evolving with each session. Currently it is only some more pigment colours and a set of Skin Illustrator alcohol activated makeup (which is by no means a cheap list for a next to nothing budget) but there are plenty of other things on the horizon that will become 'essential' to us soon as we get in to more specific applications and maybe start to do some moulding work as well.

Friday 22 October 2010

Whitley Arts Festival 2010

As part of the Whitley Arts Festival there will be a screening of The Light at The Retreat on St Johns Street in Reading on Wednesday 27th Oct.
Our film will be supporting the main feature, Street of Crocodiles , and the evening promises to be a really cool event. If you are free and in the area then get down there for 7:30 and enjoy the show.
We will of course be posting pictures and comments from the event via our shiny new Twitter account so if you haven't already done so then get following. You can expect a universe of witty and incisive comments and probably some drunken ramblings as well.

Tuesday 19 October 2010

Operation Dirt Dragon

The latest addition to our YouTube Channel is Operation Dirt Dragon. This was made for the 2010 ATB Junkies Film Festival where it went down a treat and won the Best Film award which is not really surprising when you consider that it combines mountainboarding, beautiful girls, machine guns and several men in boiler suits and gimp masks.

Coming up very soon will be part 1 of Loki's Gate, our (very nearly) full length zombie extravaganza which we are finally releasing on YouTube for anyone who didn't make the original screenings and who didn't buy a DVD (if this is you then SHAME ON YOU! It is the greatest piece of cinema ever to flow from the mind of mortals so check it out).

Wednesday 13 October 2010

Fun with silicone

In the past we have done soem pretty cool makeup effects just using latex and old newspaper but after spending literally hours watching brickintheyard tutorials on YouTube we thought it was definitely time to have a go with some silicone.
Knowing absolutely nothing about this and finding myself in Fulham on an unrelated mission I took the opportunity to drop in to Guru Makeup Emporium and have a chat about how to get started. They where really helpful and enthusiastic and I came away with a starter kit of Platsil Gel-10 and some silicone pigments.
Unfortunately I didn't get any thickener so the results of the first test are rather sloppy but it still looks pretty cool considering I just slapped it on randomly to see what it was like to work with.

First impressions are that it will take a bit of getting used to but with practice will definitely improve the quality of our prosthetics and effects in the future.

On the down side, as well as needing some thickener we are quickly building up an expensive list of other bits and pieces to do more moulding, casting, modelling etc. This stuff is great but it puts an end to the days of buying a 5 litre bottle of latex and it lasting us for three films. Ah well, I suppose progress comes at a price.

Tuesday 12 October 2010

Dead Time still

The press release for 2 Days Later 2010 just came out on their website and we were most chuffed to see that it includes a still from Dead Time.
The shot does a great job of showing of Clive, our alien foetus, in all his slimy glory.
Once the comp is done and out of the way we will put up a post about how we made him as we think he doesn't look too shabby for a pair of rubber gloves gaffer taped to a bundle of old newspaper.

Red Ded Dog on YouTube

We are the now the proud owners of our very own YouTube channel where we will be uploading our films as we make them.
The first upload is The Light which was filmed in August and over the coming weeks we will add the rest of our back catalogue as well.
Hopefully people will enjoy our films but it is also a channel for us to meet other like minded film maker types and for them to give feedback and comments (hopefully good) on our work.

Check out the channel here and subscribe if you would like to support our grand works.

Saturday 9 October 2010

Well done us!


We are feeling very pleased with ourselves today having found out that Dead Time has been shortlisted for this years 2 Days Later competition. This means that out of 51 submitted films it made it in to the final 13 that will be shown on the big screen and could win us some nice prizes as well.
The comp takes place on Oct 30th at the Theatre Royal in Margate and entry is free so if you are in the area drop in and get some horror in your life. The shortlist screening starts at 7pm and there is some kind of after party as well.
The night is optional fancy dress with a prize for best costume as well so now would be a good time to dig out the zombie clown outfit and start making up a batch of rubber intestines from our brilliant tutorial.
We hope to see you there on the night but if not we will definitely have some good pics and stories to post here after the event :)

Tuesday 28 September 2010

Latex Intestines

For Dead Time we needed to a fair amount of guts and the vegetarian talent had said no to using real ones (fair enough really) so we had to come up with a way of making some convincing fakes. In the past we have done this by making flat sheets of latex and then rolling them in to tubes but this usually ends up with short lengths that are full of holes and have a visible seam at the side. The new approach gets round all those issues and gives a pretty good result.
 
The finished guts
Me modelling the gut poles.
To start with you need a tube to form the guts around. We used lengths of plumbing pipe that double up as tracks for our home made dolly (thats another post for another time). This stuff is really cheap and you can get pretty long lengths of it in most hardware/DIY shops.

Next up you need some liquid latex and some latex thickener. The thickener is not essential but it did make the process a lot easier. Again, you can get both of these items pretty cheaply online. We use Tiranti which is a great site for all kinds of modelling and casting supplies.
Color you latex with acrylic paint or even food colouring and then add a few drops of thickener and give it a good stir.

Once you have your latex nicely thickened coat the pipe with it to the length of guts you will need. Longer is better for realism's sake but it also makes it harder to peel of the pipe later so if you can get away with short length then do that.
Once the pipe is coated leave it to dry before applying further layers of latex. Three or four layers should be enough. Use less and you will tear the latex when you peel it off, use more and it will bunch up too tight to come off the pipe at all.

Peeling the gut.
Once your final layer is dry you can peel of your intestine. Coat the whole thing with baby powder to stop it sticking to itself and then start peeling at one end. The first few inches might come off a little ragged where the lates is thin but after that it should roll off like a beauty. The more smutty minded of you will no doubt make a lot of jokes about flesh poles and zombie condoms but of course we did none of that kind of thing.

The peeling process depends a lot on how thick you made the layers and how smoothly you applied the latex. With two pairs of hands you can just pull, roll and fold it until you reach the bottom. It is pretty tough stuff so can be quite rough with it.
Make sure that you keep applying baby powder to the inside as it is exposed and when you reach the bottom you should have a fairly disgusting looking ring piece of latex that you can unroll ready to be used.
What you are left with looks a bit wrong.

We stuffed ours with cotton wool soaked in red food colouring and then covered it all in syrup blood and it looked pretty good.

If you need guts then give this technique a go and post any additions here for the good of mankind. We would also love to see any pics that you have of your guts in action.

Tick off another project

We have just put our entry for the 2 Days Later short horro comp in the post with less than 24 hours till the deadline for submissions.
The story sees two friends walking back through the woods after a party. When they get home they find out that they have been missing for eight days with no memory of where they have been or what happened to them but soon the dead time starts to catch up with them.

As always things took longer than expected and we where working on this right up to the last minute but the finished product is really good and definitely something we are proud of whether we get selected or not.
We are in the process of setting up a Red Ded Dog YouTube channel and a new web site where you will be able to watch the new film (as well as our old stuff) both of which we hope to launch in the next few weeks. Until then here is a frame from Dead Time to whet your appetite.
When investigating a strange noise, always take a machete.

Friday 10 September 2010

2 Days Later Shoot

The talent relax with a beer and a face wound.

We have spent the last three evenings this week filming our entry for this years 2 Days Later short film competition and the footage is looking really, really good.
Our idea revolves around two friends who return from a party to find that they have been missing for eight days with no memory of where they have been but who soon realise that something bad happened to them whilst they where gone.
The shoot all went pretty smoothly and despite not having much time for story boarding or rehearsals or anything like that it all came together very nicely. The weather held for us, we got good performances all round from a cast that we pretty much press ganged in to taking part whilst they where drunk and we managed to slosh around a good few litres of blood and slime without trashing my dads newly decorated and carpeted house!

Someone spilt their guts about our storyline!
Our blood recipe was really successful this time and our new technique for making latex intestines was also    a winner. As soon as we have the edit done I'll post it up here incase you ever find yourself in need of a batch of rubber guts. 

Thursday 2 September 2010

Blood

Fake blood is something that any good film maker should be getting through a lot of and while the proper theatrical stuff is pretty expensive it is fairly easy to make it yourself.

You can find loads of recipes online and we have tried most of them with varying degrees of success. The key is definitely experimentation.
You will find lots of people giving very exact measurement of ingredients but the final product will depend on temperature, what you want to do with it and where you are filming. Our advice is to make up your blood ahead of time and really play about with it till you have a mixture that is right for you.
That said here are the basics that you can build on.

You need a base to give your blood the right thickness and consistency. The main three we have used are corn flour, arrowroot and treacle or golden syrup. Whichever you choose it should be added to water and slowly heated.
Corn flour and arrowroot need to be stirred constantly and will suddenly go off. How thick it becomes depends on how much you add. Generally, just go crazy. Both these ingredients are cheap as chips from any supermarket and you can always water it down if it gets too thick.
Cornflour will make a white solution and arrowroot a clear one. Both are pretty good uncoloured if you need any kind of mucus, snot, slime etc.
If you use syrup or treacly just add it to the water and bring the heat up till the two mix.

For colour simply add food colouring. You will need a whole lot of red but also smaller amounts of green and sometimes blue or black. Blood is a lot darker than you think and sometimes appears almost black. Once again, don't hold back on the color as it is cheap and easy to get more if you need to.
Lastly you ned to add some texture as these mixtures come out a bit shiny and transparent. Mix some instant coffee with enough water to form a paste and add this to your blood and that should do the trick.
Once you are happy with it in the pan get some out and slop it about. Make sure it looks good dripping, spread thin or in puddles, whatever you need it to do on camera and just keep tweaking if its not right.

If you get the chance experiment with all kinds of stuff. If the blood has to go in people mouths then use chocolate powder instead of coffee and avoid the corn flour and arrowroot because they taste really rank. I read somewhere that Sam Raimi used the syrup recipe for Evil Dead but that he added milk to it so have fun and if you make any breakthroughs then please post here and share the joy.